


If you ride a bike (especially a MTB) fairly often or subject the bike itself to mechanical stress by using it on challenging routes, you likely know quite well that the disc brake pads are one of the bike’s parts which is subjected to greater wear. You’ll know they need to be changed when braking is weak or has little grip, or it kicks in late or oscillates, and you’ll need to completely replace the old pads with new ones. Before proceeding, it’s important to decide the type of pads to install. There are three types available:
- Organic (good cold operation, low durability, low resistance to overheating)
- Semi-metallic (they work well both hot and cold, quite durable)
- Metallic (great resistance to overheating, little grip when cold). Clearly, the choice must be made according to the type of use of the bike and the thermal and mechanical stress to which the brake pads will be subjected on average.
WHAT YOU’LL NEED
- New brake pads
- Allen wrench
- Nose pliers
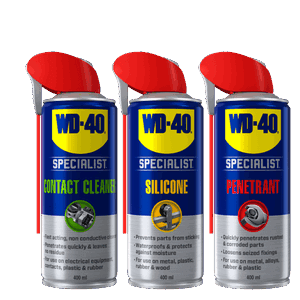
- WD-40 Multi-Use
- WD-40 Specialist Brake Cleaner
- Paper towels
- Cotton swabs
DISASSEMBLE THE CLAMP
The pads to be replaced are housed inside the clamp installed on the fork, near the disc. The clamp is fixed to the fork with two screws whose head (usually) has an Allen recess. If it is difficult to unscrew using the Allen wrench, you can spray a little WD-40 Multi-Use directly onto it using its handy straw dispenser, then let it sit for a few minutes before unscrewing. At this point separate the clamp from the disc, without detaching it from the brake cable.
REPLACE THE PADS
Unscrew the transverse screw that locks the spring on which the pads are installed. This screw may have a safety Seeger ring that you’ll need to remove with nose pliers. Also in this case, you might need to apply a little bit of WD-40 Multi-Use. You can easily pull the spring out with the clamp with your hands, pulling it outwards. If it’s a bit difficult, help yourself with the nose pliers, using them to grab the top of the spring.
PISTON MAINTENANCE
Before installing the new spring with the new pads, it is almost always necessary to perform some maintenance on the two pistons that compress the spring and pads during braking. In fact, water, mud and other elements very often interfere with the correct movement of the pistons. You can also note this defect visually if you can see that one piston protrudes more than the other inside the clamp. Isopropyl alcohol can be used to properly cleanse the piston body, but for a faster and extremely effective solution, apply a few drops of WD-40 Specialist Brake Cleaner. This compound (which contains isopropyl alcohol) perfectly cleans the body of the pistons, which will resume their normal alignment inside the clamp. After this application, dry and thoroughly clean the inside of the clamp with paper towels or cotton swabs.
INSERT THE NEW PADS AND MOUNT THE CLAMP
The new pads are usually sold together with a new clamp-holder spring. Mounting them inside the clamp is simple: compress the two sides of the spring with your hands and insert the assembly into the clamp-holder, placing it correctly between the side pistons. To stop the spring and clamp, reinsert and screw the transverse screw that goes across both the clamp supports and the protruding part of the springs. The safety Seeger ring (if present) should also be inserted on the screw.
CLAMP REASSEMBLY AND CENTRING ON THE DISC
The last thing to do is reassemble the clamp, which must be perfectly centred so that the disc is equally spaced from the pads. Replace the screws that lock the clamp to the fork without completely tightening them. In fact, before you completely tighten them you need to make sure that the disc is perfectly centred between the pads. In practice, turn the tyre and make sure that the disc doesn’t come into contact with the pads themselves while it’s turning. If this happens make adjustments on the clamp, moving it as much as necessary so that the tyre rotates without any contact. Once this position has been identified, the clamp locking screws can be tightened to the fork. The last thing to do is test the braking both with the bicycle on a stand and on the ground to make sure that the brakes are working perfectly.
To follow all the news of WD-40 Africa, follow us on Facebook and Instagram !


