


MTBs can be equipped with mechanical brakes (with the classic steel cable that drives the brake pads) or MTB hydraulic brakes in which the control levers, instead of exerting traction on a cable, act on a small pump that pressurises the oil in the braking circuit. As it is incompressible, the oil exerts the same pressure on the pistons contained in the brake caliper, which transfers it to the pads that perform the braking. The two systems are both valid, but the hydraulic systems are preferred by MTB enthusiasts because they respond particularly quickly, are reliable and offer great braking force control modulation. Naturally, they also require maintenance, which basically involves doing two things: replacing the pads and purging and replacing the braking fluid that degrades with the brakes’ intense use. In addition, air bubbles form in the circuit that reduce the braking effect.
WHAT YOU’LL NEED
- MTB hydraulic brake kit
- Bike stand
- Allen wrenches
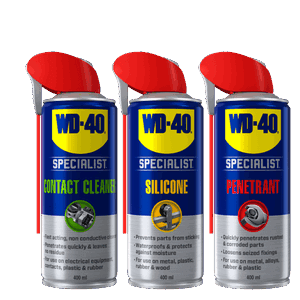
- WD-40 Multi-Use
- WD-40 Specialist Detergent
THE KIT REQUIRED
You must first obtain a kit for MTB hydraulic brakes which, depending on the model of the brakes, may have slight differences. In general, it consists of two syringes (or a syringe and a cup) with relative tubes equipped with a connection for purge sites, brake circuit oil (mineral or DOT, depending on the brake model), and one or more fork or Allen wrenches.
PURGE PREPARATION
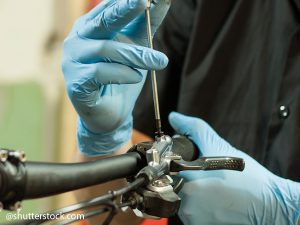
The bike must be placed on a stand that keeps it stable and correctly inclined, depending on whether the braking circuit is in the front or the rear. A right angle keeps the circuit tube as vertical as possible, facilitating the ejection of air bubbles. Loosen the brake lever and move it to the horizontal position, along with the small oil tank to which it is connected. Loosen the brake caliper and disconnect it from the frame. The pads must be removed and a “bleed-block” is inserted inside the clamp, basically a plastic spacer that keeps the pistons pressed outwards and well locked. Loosen and remove the two purge nipples present on the caliper and on the brake lever block. You can use some WD-40 Multi-Use for any of these steps if there is any resistance from the screws.
SYRINGE CONNECTIONS
Insert the tubes with the threaded connection on the two syringes, removing the plunger from one of them. Screw this (through the tube and screw fitting) onto the brake lever bleed hole. With the syringe fitted with a plunger, draw in the new oil for the braking system, filling it three-quarters. Then screw this purge tube onto the brake caliper. Instead of a syringe without a plunger, some brake models have a special cup that screws onto the brake lever drain hole.
OIL INJECTION
After loosening (1/4 turn) the “tap” of the caliper bleed, slowly press on the syringe plunger with the new oil, connected to the brake clamp, to inject it into the braking circuit. As the new oil is inserted, the exhausted oil inside the braking circuit is ejected from the purge present on the brake lever block and fills the upper syringe (which must be kept vertical). If the cup is instead present, it will fill up.
ELIMINATION OF AIR BUBBLES FROM MTB HYDRAULIC BRAKES
While injecting the oil, or at the end of the operation, we suggest gently tapping on the hose of the braking system to facilitate the ascent of any air bubbles trapped inside. An even more effective system is to inject a small amount of oil into the upper syringe, and before starting to inject the oil with the lower one, draw some oil from the circuit by pushing the plunger of the latter. With this system the air in the circuit will be sucked in and released into the lower syringe.
CLOSE THE CIRCUIT
When the new oil has replaced the exhausted oil (which has been collected in the upper syringe or cup), both drain seat tubes are disconnected and the drain seat openings are closed with the screws you previously removed. Be careful not to pour oil on your bike and brakes during this operation. To avoid leakage, the upper syringe is removed after choking the connecting tube with an elastic clip, while the lower one is removed after closing the “tap” of the starting hole.
RESTORING THE BRAKES AND CLEANING
The brake caliper released from the bleed-block must be repositioned and equipped with pads to be fixed with the transverse locking screw. The brake lever block must be returned to the correct position. Activate the brake lever a few times to check its proper operation. If during the operations any drops of oil have fallen on the bicycle, you can remove them with a few sprays of WD-40 Specialist Detergent, which eliminates liquid residue, dirt and oil.
To follow all the news of WD-40 Africa, follow us on Facebook and Instagram !


