


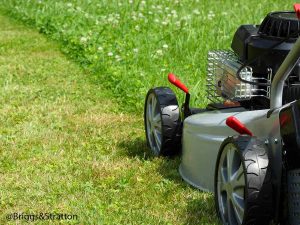
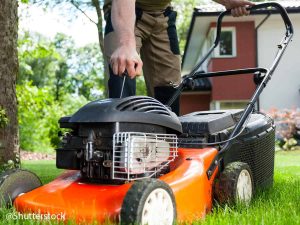
Petrol lawnmowers are the best machines for mowing medium to large areas of grass. Its strengths compared to an electric or battery-powered lawnmower are its power and operating autonomy, which allow working for longer and without the constraints of a power cord or having to stop to charge the battery. These machines are quite complex and heavy, and are also available in a self-propelled version (the engine also moves the wheels and you don’t have to push it). The self-propelled version is especially appreciated on hills. On the other hand, it requires particularly careful checks and maintenance, since there are many mechanisms involved. You must always follow the manufacturer’s instructions for these operations, as well as for spare parts and consumables. Having said that, there are several checks you can perform yourself to keep your petrol lawnmower in good working order. Let’s take a look. Please always perform maintenance with the lawnmower turned off.
What you’ll need
- Screwdriver
- Specialist High-Performance PTFE Lubricant
- Compressor
- Carburettor cleaning brush
Step 1 : Clean the filters
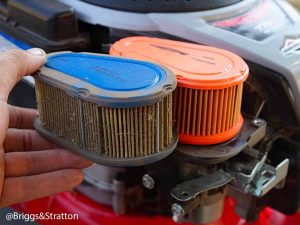
A properly functioning air filter is a lawnmower’s first line of defence in counteracting the dirt and debris that are lifted during the mowing process. When the air filter is in good condition and working properly, it prevents dirt from entering the engine through the carburettor. But if the air filter is worn and dirty, then a great deal of debris can penetrate the engine. A lawnmower’s air filter is usually located near the top of the engine and is enclosed in a metal or plastic cover that is usually secured by a screw or snap fittings. There are different types of air filters on the market: some are foam filters, some are rigid paper and some are hybrid that include both a foam element as a pre-filter and a paper element as a main filter. Some can be cleaned or washed, others only need to be periodically replaced.
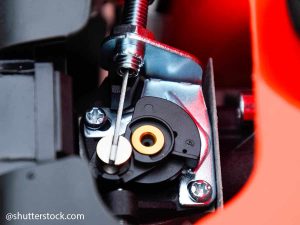
Step 2 : Clean the carburetor
If the petrol lawnmower’s engine is not working properly, the carburettor jets may be clogged. Unscrew them with a screwdriver and clean them with a spray of WD-40 Specialist High-Performance PTFE Lubricant. Clear any obstructions with a carburetor cleaning brush and a spray of compressed air. When checking the carburetor, you should also check the state of the filter.
 Step 3 : Check the oil level
 Step 3 : Check the oil level
 To check the oil level of a petrol lawnmower, remove the rod connected to the tank cap, clean it and put it back in place, then remove it after a few seconds to check that the oil level is between the minimum and maximum notches, better if closer to the latter. Refill if necessary, and make sure that the oil is replaced once a year. Specific lawnmower oils must be used with a specific viscosity level for this type of machine.
Step 4 : Check the cutting height
The cutting height adjustment lever, which is usually located on one side of the machine near a rear wheel, lets you choose between several predefined cutting heights, generally between 20 and 70 mm. The lifting mechanism must be well cleaned and lubricated with WD-40 Specialist High-Performance PTFE Lubricant. It’s important to avoid lowering the cutting height too much in early spring in order to avoid excessively “offending” the stems that are slowly awakening from their winter slumber.
Step 5 : Check the controls
 Step 5 : Check the controls
The engine’s operation is controlled by a lever that must be kept pressed against the handle, and the engine switches off when it is released. In self-propelled models there is a second lever that controls forward movement. After a preliminary cleaning. all the joints and steel cables of the various controls should be lubricated with WD-40 Specialist High-Performance PTFE Lubricant. The wheels are also subject to wear caused by mud, stones and cut grass. They should be rinsed after every use and their axis should be lubricated with the lubricant mentioned.
Step 6 : Check blade sharpness
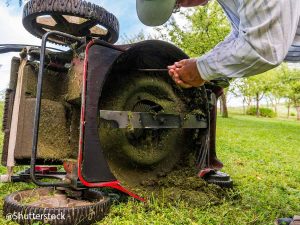 Step 6 : Check blade sharpness
 The blade is undoubtedly the part of the machine that is most stressed. It should be carefully examined before each use of the machine. If you note any deterioration or deformation due to contact with stones or soil, it must be disassembled by unscrewing the central screw, then sharpened while maintaining the appropriate cutting angle. If you don’t have the right grinding wheel, have it sharpened at a specialised centre.
To follow all the news of WD-40 Africa, follow us on Facebook and Instagram !


